PHP сценарии обработки HTML форм. Создаем невероятную простую систему регистрации на PHP и MySQL Багровый register form php
Процесс создания системы регистрации – это довольно большой объем работы. Вам нужно написать код, который бы перепроверял валидность email-адресов, высылал email-письма с подтверждением, предлагал возможность восстановить пароль, хранил бы пароли в безопасном месте, проверял формы ввода и многое другое. Даже когда вы все это сделаете, пользователи будут регистрироваться неохотно, так как даже самая минимальная регистрация требует их активности.
В сегодняшнем руководстве мы займемся разработкой простой системы регистрации, с использованием которой вам не понадобятся никакие пароли! В результаты мы получим, систему, которую можно будет без труда изменить или встроить в существующий PHP-сайт. Если вам интересно, продолжайте чтение.
PHP
Теперь мы готовы к тому, чтобы заняться кодом PHP. Основной функционал системы регистрации предоставляется классом User, который вы можете видеть ниже. Класс использует (), представляющую собой минималистскую библиотеку для работы с базами данных. Класс User отвечает за доступ к базам данных, генерирование token-ов для логина и их валидации. Он представляет нам простой интерфейс, который можно без труда включить в систему регистрации на ваших сайтах, основанных на PHP.
User.class.php
// Private ORM instance
private $orm;
/**
* Find a user by a token string. Only valid tokens are taken into
* consideration. A token is valid for 10 minutes after it has been generated.
* @param string $token The token to search for
* @return User
*/
Public static function findByToken($token){
// find it in the database and make sure the timestamp is correct
->where("token", $token)
->where_raw("token_validity > NOW()")
->find_one();
If(!$result){
return false;
}
Return new User($result);
}
/**
* Either login or register a user.
* @return User
*/
Public static function loginOrRegister($email){
// If such a user already exists, return it
If(User::exists($email)){
return new User($email);
}
// Otherwise, create it and return it
Return User::create($email);
}
/**
* Create a new user and save it to the database
* @param string $email The user"s email address
* @return User
*/
Private static function create($email){
// Write a new user to the database and return it
$result = ORM::for_table("reg_users")->create();
$result->email = $email;
$result->save();
Return new User($result);
}
/**
* Check whether such a user exists in the database and return a boolean.
* @param string $email The user"s email address
* @return boolean
*/
Public static function exists($email){
// Does the user exist in the database?
$result = ORM::for_table("reg_users")
->where("email", $email)
->count();
Return $result == 1;
}
/**
* Create a new user object
* @param $param ORM instance, id, email or null
* @return User
*/
Public function __construct($param = null){
If($param instanceof ORM){
// An ORM instance was passed
$this->orm = $param;
}
else if(is_string($param)){
// An email was passed
$this->
->where("email", $param)
->find_one();
}
else{
If(is_numeric($param)){
// A user id was passed as a parameter
$id = $param;
}
else if(isset($_SESSION["loginid"])){
// No user ID was passed, look into the sesion
$id = $_SESSION["loginid"];
}
$this->orm = ORM::for_table("reg_users")
->where("id", $id)
->find_one();
}
/**
* Generates a new SHA1 login token, writes it to the database and returns it.
* @return string
*/
Public function generateToken(){
// generate a token for the logged in user. Save it to the database.
$token = sha1($this->email.time().rand(0, 1000000));
// Save the token to the database,
// and mark it as valid for the next 10 minutes only
$this->orm->set("token", $token);
$this->orm->set_expr("token_validity", "ADDTIME(NOW(),"0:10")");
$this->orm->save();
Return $token;
}
/**
* Login this user
* @return void
*/
Public function login(){
// Mark the user as logged in
$_SESSION["loginid"] = $this->orm->id;
// Update the last_login db field
$this->orm->set_expr("last_login", "NOW()");
$this->orm->save();
}
/**
* Destroy the session and logout the user.
* @return void
*/
Public function logout(){
$_SESSION = array();
unset($_SESSION);
}
/**
* Check whether the user is logged in.
* @return boolean
*/
Public function loggedIn(){
return isset($this->orm->id) && $_SESSION["loginid"] == $this->orm->id;
}
/**
* Check whether the user is an administrator
* @return boolean
*/
Public function isAdmin(){
return $this->rank() == "administrator";
}
/**
* Find the type of user. It can be either admin or regular.
* @return string
*/
Public function rank(){
if($this->orm->rank == 1){
return "administrator";
}
Return "regular";
}
/**
* Magic method for accessing the elements of the private
* $orm instance as properties of the user object
* @param string $key The accessed property"s name
* @return mixed
*/
Public function __get($key){
if(isset($this->orm->$key)){
return $this->orm->$key;
}
Return null;
}
}
Token-ы генерируются при помощи алгоритма , и сохраняются в базу данных. Мы используем из MySQL для установки значения в колонку token_validity, равного 10 минутам. При валидации token, мы сообщаем движку, что нам нужен token, поле token_validity пока еще не истекло. Таким образом мы ограничиваем время, в течение которого token будет валиден.
Обратите внимание на то, что мы используем волшебный метод __get () в конце документа, чтобы получить доступ к свойствам объекта user. Это позволяет нам осуществить доступ к данным, которые хранятся в базе данных в виде свойств: $user->email, $user->token. Для примера давайте посмотрим, как мы можем использовать этот класс в следующем фрагменте кода:

Еще один файл, в котором хранится необходимый функционал, это functions.php. Там у нас есть несколько вспомогательных функций, которые позволяют нам сохранить остальной код более опрятным.
Functions.php
Function send_email($from, $to, $subject, $message){
// Helper function for sending email
$headers = "MIME-Version: 1.0" . "\r\n";
$headers .= "Content-type: text/plain; charset=utf-8" . "\r\n";
$headers .= "From: ".$from . "\r\n";
Return mail($to, $subject, $message, $headers);
}
function get_page_url(){
// Find out the URL of a PHP file
$url = "http".(empty($_SERVER["HTTPS"])?"":"s")."://".$_SERVER["SERVER_NAME"];
If(isset($_SERVER["REQUEST_URI"]) && $_SERVER["REQUEST_URI"] != ""){
$url.= $_SERVER["REQUEST_URI"];
}
else{
$url.= $_SERVER["PATH_INFO"];
}
Return $url;
}
function rate_limit($ip, $limit_hour = 20, $limit_10_min = 10){
// The number of login attempts for the last hour by this IP address
$count_hour = ORM::for_table("reg_login_attempt")
->
->where_raw("ts > SUBTIME(NOW(),"1:00")")
->count();
// The number of login attempts for the last 10 minutes by this IP address
$count_10_min = ORM::for_table("reg_login_attempt")
->where("ip", sprintf("%u", ip2long($ip)))
->where_raw("ts > SUBTIME(NOW(),"0:10")")
->count();
If($count_hour > $limit_hour || $count_10_min > $limit_10_min){
throw new Exception("Too many login attempts!");
}
}
function rate_limit_tick($ip, $email){
// Create a new record in the login attempt table
$login_attempt = ORM::for_table("reg_login_attempt")->create();
$login_attempt->email = $email;
$login_attempt->ip = sprintf("%u", ip2long($ip));
$login_attempt->save();
}
function redirect($url){
header("Location: $url");
exit;
}
Функции rate_limit и rate_limit_tick позволяют нам ограничивать число попыток авторизации на определенный промежуток времени. Попытки авторизации записываются в базу данных reg_login_attempt. Эти функции запускаются при проведении подтверждения формы авторизации, как можно видеть в следующем фрагменте кода.
Нижеприведенный код был взят из index.php, и он отвечает за подтверждение формы авторизации. Он возвращает JSON-ответ, который управляется кодом jQuery, который мы видели в assets/js/script.js.
index.php
If(!empty($_POST) && isset($_SERVER["HTTP_X_REQUESTED_WITH"])){
// Output a JSON header
Header("Content-type: application/json");
// Is the email address valid?
If(!isset($_POST["email"]) || !filter_var($_POST["email"], FILTER_VALIDATE_EMAIL)){
throw new Exception("Please enter a valid email.");
}
// This will throw an exception if the person is above
// the allowed login attempt limits (see functions.php for more):
rate_limit($_SERVER["REMOTE_ADDR"]);
// Record this login attempt
rate_limit_tick($_SERVER["REMOTE_ADDR"], $_POST["email"]);
// Send the message to the user
$message = "";
$email = $_POST["email"];
$subject = "Your Login Link";
If(!User::exists($email)){
$subject = "Thank You For Registering!";
$message = "Thank you for registering at our site!\n\n";
}
// Attempt to login or register the person
$user = User::loginOrRegister($_POST["email"]);
$message.= "You can login from this URL:\n";
$message.= get_page_url()."?tkn=".$user->generateToken()."\n\n";
$message.= "The link is going expire automatically after 10 minutes.";
$result = send_email($fromEmail, $_POST["email"], $subject, $message);
If(!$result){
throw new Exception("There was an error sending your email. Please try again.");
}
Die(json_encode(array(
"message" => "Thank you! We\"ve sent a link to your inbox. Check your spam folder as well."
)));
}
}
catch(Exception $e){
Die(json_encode(array(
"error"=>1,
"message" => $e->getMessage()
)));
}
При успешной авторизации или регистрации, вышеприведенный код отсылает email человеку с ссылкой для авторизации. Token (лексема) становится доступной в качестве $_GET-переменной "tkn" ввиду сгенерированного URL.
index.php
If(isset($_GET["tkn"])){
// Is this a valid login token?
$user = User::findByToken($_GET["tkn"]);
// Yes! Login the user and redirect to the protected page.
$user->login();
redirect("protected.php");
}
// Invalid token. Redirect back to the login form.
redirect("index.php");
}
Запуск $user->login() создаст необходимые переменные для сессии, что позволит пользователю оставаться авторизованным при последующих входах.
Выход из системы реализуется примерно таким же образом:
Index.php
If(isset($_GET["logout"])){
$user = new User();
If($user->loggedIn()){
$user->logout();
}
Redirect("index.php");
}
В конце кода мы снова перенаправляем пользователя на index.php, поэтому параметр?logout=1 в URL исключается.
Нашему файлу index.php также потребуется защита – мы не хотим, чтобы уже авторизованные пользователи видели форму. Для этого мы используем метод $user->loggedIn():
Index.php
$user = new User();
if($user->loggedIn()){
redirect("protected.php");
}
Наконец, давайте посмотрим, как можно защитить страницу вашего сайта, и сделать ее доступной только после авторизации:
protected.php
// To protect any php page on your site, include main.php
// and create a new User object. It"s that simple!
require_once "includes/main.php";
$user = new User();
if(!$user->loggedIn()){
redirect("index.php");
}
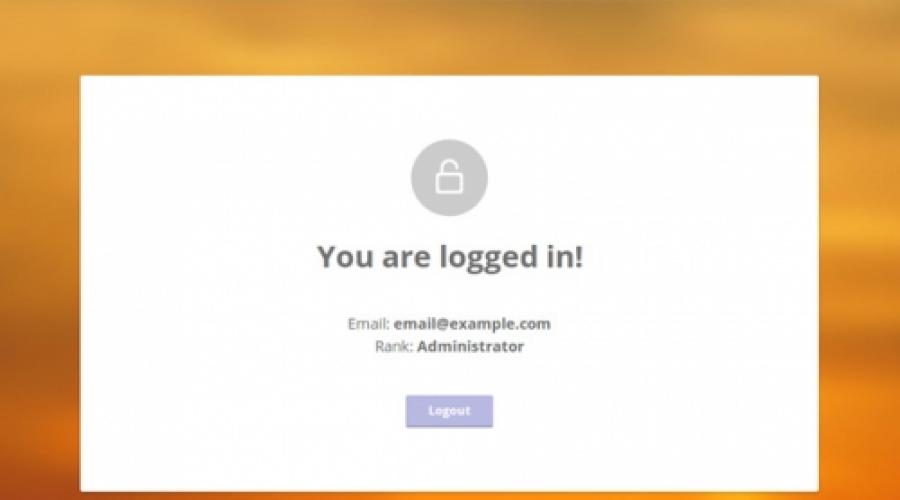
После этой проверки вы можете быть уверены в том, что пользователь успешно авторизовался. У вас также будет доступ к данным, которые хранятся в базе данных в качестве свойств объекта $user. Чтобы вывести email пользователя и их ранг, воспользуйтесь следующим кодом:
Echo "Your email: ".$user->email;
echo "Your rank: ".$user->rank();
Здесь rank() – это метод, так как колонка rank в базе данных обычно содержит числа (0 для обычных пользователей и 1 для администраторов), и нам нужно преобразовать это все в названия рангов, что реализуется при помощи данного метода. Чтобы преобразовать обычного пользователя в администратора, просто отредактируйте запись о пользователе в phpmyadmin (либо в любой другой программе по работе с базами данных). Будучи администратором, пользователь не будет наделен какими-то особыми возможностями. Вы сами в праве выбирать, каким правами наделять администраторов.
Готово!
На этом наша простенькая система регистрации готова! Вы можете использовать ее на уже существующем PHP-сайте, либо модернизировать ее, придерживаясь собственных требований.
Здравствуйте! Сейчас мы попробуем реализовать самую простую регистрацию на сайте с помощью PHP + MySQL. Для этого на вашем компьютере должен быть установлен Apache. Принцип работы нашего скрипта изображен ниже.
1. Начнем с создания таблички users в базе . Она будет содержать данные пользователя (логин и пароль). Зайдем в phpmyadmin (если вы создаете базу на своем ПК http://localhost/phpmyadmin/ ). Создаем таблицу users , в ней будет 3 поля.

Я создаю ее в базе mysql, вы можете создавать в другой базе. Далее устанавливаем значения, как на рисунке:
2. Необходимо соединение с этой таблицей. Давайте создадим файл bd.php . Его содержание:
$db = mysql_connect ("ваш MySQL сервер","логин к этому серверу","пароль к этому серверу");
mysql_select_db ("имя базы, к которой подключаемся",$db);
?>
В моем случае это выглядит так:
$db = mysql_connect ("localhost","user","1234");
mysql_select_db ("mysql",$db);
?>
Сохраняем bd.php
.
Отлично! У нас есть таблица в базе, соединение к ней. Теперь можно приступать к созданию странички, на которой пользователи будут оставлять свои данные.
3. Создаем файл reg.php с содержанием (все комментарии внутри):
Регистрация
4. Создаем файл , который будет заносить данные в базу и сохранять пользователя. save_user.php (комментарии внутри):
{
}
//если логин и пароль введены, то обрабатываем их, чтобы теги и скрипты не работали, мало ли что люди могут ввести
//удаляем лишние пробелы
$login = trim($login);
$password = trim($password);
// подключаемся к базе
// проверка на существование пользователя с таким же логином
$result = mysql_query("SELECT id FROM users WHERE login="$login"",$db);
if (!empty($myrow["id"])) {
exit ("Извините, введённый вами логин уже зарегистрирован. Введите другой логин.");
}
// если такого нет, то сохраняем данные
$result2 = mysql_query ("INSERT INTO users (login,password) VALUES("$login","$password")");
// Проверяем, есть ли ошибки
if ($result2=="TRUE")
{
echo "Вы успешно зарегистрированы! Теперь вы можете зайти на сайт. Главная страница";
}
else {
echo "Ошибка! Вы не зарегистрированы.";
}
?>
5. Теперь наши пользователи могут регистрироваться! Далее необходимо сделать "дверь" для входа на сайт уже зарегистрированным пользователям. index.php (комментарии внутри) :
// вся процедура работает на сессиях. Именно в ней хранятся данные пользователя, пока он находится на сайте. Очень важно запустить их в самом начале странички!!!
session_start();
?>
Главная страница
// Проверяем, пусты ли переменные логина и id пользователя
if (empty($_SESSION["login"]) or empty($_SESSION["id"]))
{
// Если пусты, то мы не выводим ссылку
echo "Вы вошли на сайт, как гость
Эта ссылка доступна только зарегистрированным пользователям";
}
else
{
В файле index.php мы выведем ссылочку, которая будет открыта только для зарегистрированных пользователей. В этом и заключается вся суть скрипта - ограничить доступ к каким-либо данным.
6. Остался файл с проверкой введенного логина и пароля. testreg.php (комментарии внутри):
session_start();// вся процедура работает на сессиях. Именно в ней хранятся данные пользователя, пока он находится на сайте. Очень важно запустить их в самом начале странички!!!
if (isset($_POST["login"])) { $login = $_POST["login"]; if ($login == "") { unset($login);} } //заносим введенный пользователем логин в переменную $login, если он пустой, то уничтожаем переменную
if (isset($_POST["password"])) { $password=$_POST["password"]; if ($password =="") { unset($password);} }
//заносим введенный пользователем пароль в переменную $password, если он пустой, то уничтожаем переменную
if (empty($login) or empty($password)) //если пользователь не ввел логин или пароль, то выдаем ошибку и останавливаем скрипт
{
exit ("Вы ввели не всю информацию, вернитесь назад и заполните все поля!");
}
//если логин и пароль введены,то обрабатываем их, чтобы теги и скрипты не работали, мало ли что люди могут ввести
$login = stripslashes($login);
$login = htmlspecialchars($login);
$password = stripslashes($password);
$password = htmlspecialchars($password);
//удаляем лишние пробелы
$login = trim($login);
$password = trim($password);
// подключаемся к базе
include ("bd.php");// файл bd.php должен быть в той же папке, что и все остальные, если это не так, то просто измените путь
$result = mysql_query("SELECT * FROM users WHERE login="$login"",$db); //извлекаем из базы все данные о пользователе с введенным логином
$myrow = mysql_fetch_array($result);
if (empty($myrow["password"]))
{
//если пользователя с введенным логином не существует
}
else {
//если существует, то сверяем пароли
if ($myrow["password"]==$password) {
//если пароли совпадают, то запускаем пользователю сессию! Можете его поздравить, он вошел!
$_SESSION["login"]=$myrow["login"];
$_SESSION["id"]=$myrow["id"];//эти данные очень часто используются, вот их и будет "носить с собой" вошедший пользователь
echo "Вы успешно вошли на сайт! Главная страница";
}
else {
//если пароли не сошлись
Exit ("Извините, введённый вами login или пароль неверный.");
}
}
?>
Ну вот и все! Может урок и скучный, но очень полезный. Здесь показана только идея регистрации, далее Вы можете усовершенствовать ее: добавить защиту, оформление, поля с данными, загрузку аватаров, выход из аккаунта (для этого просто уничтожить переменные из сессии функцией unset ) и так далее. Удачи!
Все проверил, работает исправно!
В основном, для передачи параметров используются методы POST
и GET
.
Главное отличие методов POST
и GET
заключается в способе передачи информации. В методе GET
параметры передаются через адресную строку (URL
), т.е. в HTTP
-заголовке запроса, в то время как в методе POST
параметры передаются через тело HTTP
-запроса и никак не отражаются в адресной строке.
1. Кнопки – Тег
Тег создает на веб-странице кнопки и по своему действию напоминает результат, получаемый с помощью тега
(с параметром type="button | reset | submit"
). В отличие от этого тега, предлагает расширенные возможности по созданию кнопок. Например, на подобной кнопке можно размещать любые элементы HTML
, в том числе изображения. Используя стили, можно определить вид кнопки путем изменения шрифта, цвета фона, размеров и других параметров.
Теоретически, тег должен располагаться внутри формы, устанавливаемой элементом . Тем не менее, браузеры не выводят сообщение об ошибке и корректно работают с тегом , если он встречается самостоятельно. Однако, если необходимо результат нажатия на кнопку отправить на сервер, помещать в контейнер обязательно. Закрывающий тег
обязателен.
Параметры:
disabled
– блокирует доступ и изменение элемента.
type
– тип кнопки
value
– Значение кнопки, которое будет отправлено на сервер или прочитано с помощью сприптов.
Параметр DISABLED
Блокирует доступ и изменение кнопки. Она в таком случае отображается серой и недоступной для активации пользователем. Кроме того, такая кнопка не может получить фокус путем нажатия на клавишу Tab
, мышью или другим способом. Тем не менее, такое состояние кнопки можно изменять через скрипты.
Определяет тип кнопки, который устанавливает ее поведение в форме. По внешнему виду кнопки разного типа никак не различаются, но у каждой такой кнопки свои функции. Значение по умолчанию: button .
Аргументы:
button – Обычная кнопка.
reset – Кнопка для очистки введенных данных формы и возвращения значений в первоначальное состояние.
Submit – Кнопка для отправки данных формы на сервер.
Параметр VALUE Определяет значение кнопки, которое будет отправлено на сервер. На сервер отправляется пара «имя=значение », где имя задается параметром name тега , а значение - параметром value . Значение может, как совпадать с текстом на кнопке, так быть и самостоятельным. Также параметр value применяется для доступа к данным через скрипты.1.1. Кнопка (input type=button)
1.2. Кнопка с изображением (input type=image)
Кнопки с изображениями аналогичны по действию кнопке Submit
, но представляют собой рисунок. Для этого задаем type=image
и src="image.gif"
.
Когда пользователь щелкнет где-нибудь на изображении, соответствующая форма будет передана на сервер с двумя дополнительными переменными – sub_x и sub_y . Они содержат координаты нажатия пользователя на изображение. Опытные программисты могут заметить, что на самом деле имена переменных, отправленных браузером, содержат точку, а не подчеркивание, но PHP автоматически конвертирует точку в подчеркивание.
1.3. Кнопка отправки формы (input type=submit)
Служит для отправки формы сценарию. При создании кнопки для отправки формы необходимо указать 2 атрибута: type="submit"
и value="Текст кнопки"
. Атрибут name необходим, если кнопка не одна, а несколько и все они созданы для разных операций, например кнопки "Сохранить", "Удалить", "Редактировать" и т.д. После нажатия на кнопку сценарию передается строка имя=текст кнопки.
РНР
-сценарий не требуется.
1.4. Массив кнопок (submit) для выбора варианта действий
2. Кнопка сброса формы (Reset)
При нажатии на кнопку сброса (reset
), все элементы формы будут установлены в то состояние, которое было задано в атрибутах по умолчанию, причем отправка формы не производиться.
РНР
-сценарий не требуется.
3. Флажок (checkbox)
Флажки checkbox предлагают пользователю ряд вариантов, и разрешает произвольный выбор (ни одного, одного или нескольких из них).
$go) { echo $index." - > ".$go."
"; }; };
4. Переключатель(radio)
Переключатели radio предлагают пользователю ряд вариантов, но разрешает выбрать только один из них.
Пример 1.
Пример 2.
\n"; ?>
5. Текстовое поле (text)
При создании обычного текстового поля размером size и максимальной допустимой длины maxlength
символов, атрибут type принимает значение text
. Если указан параметр value
, то поле будет отображать указанный в переменной value. При создании поля не забывайте указывать имя поля, т.к. этот атрибут является обязательным.
6. Поле для ввода пароля (password)
Полностью аналогичен текстовому полю, за исключением того, что символы, набираемые пользователем, не будут отображаться на экране.
7. Скрытое текстовое поле (hidden)
Позволяет передавать сценарию какую то служебную информацию, не отображая её на странице.
8. Выпадающий список (select)
Тэг представляет собой выпадающий или раскрытый список, при этом одновременно могут быть выбраны одна или несколько строк. Но будет передано значение последней выбранной кнопке.
Список начинается с парных тегов
. Теги
позволяют определить содержимое списка, а параметр value
определяет значение строки. Если в теге указан параметр selected
, то строка будет изначально выбранной. Параметр size задает, сколько строк будет занимать список. Если size
равен 1
, то список будет выпадающим. Если указан атрибут multiple
, то разрешено выбирать несколько элементов из списка. Но эта схема практически не используется, а при size = 1
не имеет смысла.
Если необходимо создать выпадающий с предсказуемой последовательностью. Например, список с годами с 2000 по 2050. То используется следующий прием.
9. Многострочное поле ввода текста (textarea)
Многострочное поле ввода текста позволяет отправлять не одну строку, а сразу несколько. При необходимости можно указать атрибут readonly
, который запрещает редактировать, удалять и изменять текст, т.е. текст будет предназначен только для чтения. Если необходимо чтобы текст был изначально отображен в многострочном поле ввода, то его необходимо поместить между тэгами
.
Существует параметр wrap
– задание переноса строк. Возможные значения:
off
– отключает перенос строк;
virtuals
– показывает переносы строк, но отправляет текст как он введен;
physical
– переносы строк оставляются в исходном виде.
По умолчанию тег
Для того, чтобы в многострочном текстовом поле соблюдалось html-форматирование (перенос строк по средством тега
или
), то используйте функцию nl2br()
:
10. Кнопка для загрузки файлов (browse)
Служит для реализации загрузки файлов на сервер. При создании текстового поля также необходимо указать тип поля type
как "file"
.
Способы общения браузера с сервером
Способов, предоставляемых протоколом HTTP
, немного. Это важная информация. Никаких других способов нет. На практике используются два:
GET
– это когда данные передаются в адресной строке, например, когда пользователь жмет ссылку.
POST
– когда он нажимает кнопку в форме.
Метод GET
Чтобы передать данные методом GET
не надо создавать на HTML
-странице форму (использовать формы для запросов методом GET
вам никто не запрещает) – достаточно ссылки на документ с добавлением строки запроса, которая может выглядеть как переменная=значение. Пары объединяются с помощью амперсанда &, а к URL
страницы строка присоединяется с помощью вопросительного знака «?
».
Но можно не использовать пары ключ=значение, если надо передать всего одну переменную – для этого надо после знака вопроса написать ЗНАЧЕНИЕ
(не имя) переменной.
Преимущество
передачи параметров таким способом заключается в том, что клиенты, которые не могут использовать метод POST
(например, поисковые машины), все же смогут, просто пройдя по ссылке, передать параметры скрипту и получить содержимое.
Недостаток
в том, что просто изменив параметры в адресной строке, пользователь может повернуть ход сценария непредсказуемым образом и это создает огромную дыру в безопасности, в сочетании с неопределенными переменными и register_globals on
или кто-нибудь может узнать значение важной переменной (например ID
-сеcсии), просто посмотрев на экран монитора.
:
- для доступа к общедоступным страницам с передачей параметров (повышение функциональности)
- передача информации, не влияющей на уровень безопасности
:
- для доступа к защищенным страницам с передачей параметров
- для передачи информации, влияющей на уровень безопасности
- для передачи информации, не подлежащей модифицированию пользователем (некоторые передают текст SQL
-запросов.
Метод POST
Передать данные методом POST
можно только с помощью формы на HTML
странице. Основное отличие POST
от GET
в том, что данные передаются не в заголовке запроса а в теле, следовательно, пользователь их не видит. Модифицировать можно только изменив саму форму.
Преимущество
:
- большая безопасность и функциональность запросов с помощью форм методом POST
.
Недостаток
:
- меньшая доступность.
Для чего следует использовать
:
- для передачи большого объема информации (текст, файлы..);
- для передачи любой важной информации;
- для ограничения доступа (например, использовать для навигации только форму – возможность, доступная не всем программам-роботам или грабберам-контента).
Для чего не следует использовать
:
PHP
способен принимать файл, загружаемый при помощи любого браузера,. Это дает возможность загружать как текстовые, так и бинарные файлы. Вместе с PHP
-аутентификацией и функциями для работы с файловой системой, вы получаете полный контроль над тем, кому разрешено загружать файлы, и над тем, что делать с файлом после его загрузки.
Страница для загрузки файлов может быть реализована при помощи специальной формы, которая выглядит примерно так:
//Форма для загрузки файлов
В приведенном выше примере "URL
"
необходимо заменить ссылкой на PHP
-скрипт. Скрытое поле MAX
_FILE_SIZE
(значение необходимо указывать в байтах) должно предшествовать полю для выбора файла, и его значение является максимально допустимым размером принимаемого файла. Также следует убедиться, что в атрибутах формы вы указали enctype="multipart/form-data"
, в противном случае загрузка файлов на сервер выполняться не будет.
Внимание
Опция MAX
_FILE_SIZE
является рекомендацией браузеру, даже если бы PHP
также проверял это условие. Обойти это ограничение на стороне браузера достаточно просто, следовательно, вы не должны полагаться на то, что все файлы большего размера будут блокированы при помощи этой возможности. Тем не менее, ограничение PHP
касательно максимального размера обойти невозможно. Вы в любом случае должны добавлять переменную формы MAX
_FILE_SIZE
, так как она предотвращает тревожное ожидание пользователей при передаче огромных файлов, только для того, чтобы узнать, что файл слишком большой и передача фактически не состоялась.
Как определить метод запроса?
Напрямую:
Getenv("REQUEST_METHOD");
вернет GET или POST .
Какой способ следует применять?
Если форма служит для запроса некой информации, например – при поиске, то ее следует отправлять методом GET
. Чтобы можно было обновлять страницу, можно было поставить закладку и/или послать ссылку другу.
Если же в результате отправки формы данные записываются или изменяются на сервере, то следует их отправлять методом POST
, причем обязательно, после обработки формы, надо перенаправить браузер методом GET
. Так же, POST
может понадобиться, если на сервер надо передать большой объём данных (у GET
он сильно ограничен), а так же, если не следует "светить" передаваемые данные в адресной строке (при вводе логина и пароля, например).
В любом случае, после обработки POST
надо всегда перенаправить браузер на какую-нибудь страницу, пусть ту же самую, но уже без данных формы, чтобы при обновлении страницы они не записывались повторно.
Как передать данные в другой файл непосредственно из тела PHP -программы методом GET и POST ?
Пример, для демонстрации отправки данных методом POST и GET одновременно и получения ответа от сервера.
Over the past few years, web hosting has undergone a dramatic change. Web hosting services have changed the way websites perform. There are several kinds of services but today we will talk about the options that are available for reseller hosting providers. They are Linux Reseller Hosting and Windows Reseller Hosting. Before we understand the fundamental differences between the two, let’s find out what is reseller hosting.
Reseller Hosting
In simple terms, reseller hosting is a form of web hosting where an account owner can use his dedicated hard drive space and allotted bandwidth for the purpose of reselling to the websites of third parties. Sometimes, a reseller can take a dedicated server from a hosting company (Linux or Windows) on rent and further let it out to third parties.
Most website users either are with Linux or Windows. This has got to do with the uptime. Both platforms ensure that your website is up 99% of the time.
1. Customization
One of the main differences between a Linux Reseller Hostingplan and the one provided by Windows is about customization. While you can experiment with both the players in several ways, Linux is way more customizable than Windows. The latter has more features than its counterpart and that is why many developers and administrators find Linux very customer- friendly.
2. Applications
Different reseller hosting services have different applications. Linux and Windows both have their own array of applications but the latter has an edge when it comes to numbers and versatility. This has got to do with the open source nature of Linux. Any developer can upload his app on the Linux platform and this makes it an attractive hosting provider to millions of website owners.
However, please note that if you are using Linux for web hosting but at the same time use the Windows OS, then some applications may not simply work.
3. Stability
While both the platforms are stable, Linux Reseller Hosting is more stable of the two. It being an open source platform, can work in several environments.This platform can be modified and developed every now and then.
4. .NET compatibility
It isn’t that Linux is superior to Windows in every possible way. When it comes to .NET compatibility, Windows steals the limelight. Web applications can be easily developed on a Windows hosting platform.
5. Cost advantages
Both the hosting platforms are affordable. But if you are feeling a cash crunch, then you should opt for Linux. It is free and that is why it is opted by so many developers and system administrators all around the world.
6. Ease of setup
Windows is easier to set up than its counterpart. All things said and done, Windows still retains its user-friendliness all these years.
7. Security
Opt for Linux reseller hosting because it is more secure than Windows. This holds true especially for people running their E-commerce businesses.
Conclusion
Choosing between the two will depend on your requirement and the cost flexibility. Both the hosting services have unique advantages. While Windows is easy to set up, Linux is cost effective, secure and is more versatile.

Back in March of this year, I had a very bad experience with a media company refusing to pay me and answer my emails. They still owe me thousands of dollars and the feeling of rage I have permeates everyday. Turns out I am not alone though, and hundreds of other website owners are in the same boat. It"s sort of par for the course with digital advertising.
In all honesty, I"ve had this blog for a long time and I have bounced around different ad networks in the past. After removing the ad units from that company who stiffed me, I was back to square one. I should also note that I never quite liked Googles AdSense product, only because it feels like the "bottom of the barrel" of display ads. Not from a quality perspective, but from a revenue one.
From what I understand, you want Google advertising on your site, but you also want other big companies and agencies doing it as well. That way you maximize the demand and revenue.
After my negative experience I got recommend a company called Newor Media . And if I"m honest I wasn"t sold at first mostly because I couldn"t find much information on them. I did find a couple decent reviews on other sites, and after talking to someone there, I decided to give it a try. I will say that they are SUPER helpful. Every network I have ever worked with has been pretty short with me in terms of answers and getting going. They answered every question and it was a really encouraging process.
I"ve been running the ads for a few months and the earnings are about in line with what I was making with the other company. So I can"t really say if they are that much better than others, but where they do stand out is a point that I really want to make. The communication with them is unlike any other network I"ve ever worked it. Here is a case where they really are different:
They pushed the first payment to me on time with Paypal. But because I"m not in the U.S (and this happens for everyone I think), I got a fee taken out from Paypal. I emailed my representative about it, asking if there was a way to avoid that in the future.
They said that they couldn"t avoid the fee, but that they would REIMBURSE ALL FEES.... INCLUDING THE MOST RECENT PAYMENT! Not only that, but the reimbursement payment was received within 10 MINUTES! When have you ever been able to make a request like that without having to be forwarded to the "finance department" to then never be responded to.
The bottom line is that I love this company. I might be able to make more somewhere else, I"m not really sure, but they have a publisher for life with me. I"m not a huge site and I don"t generate a ton of income, but I feel like a very important client when I talk to them. It"s genuinely a breathe of fresh air in an industry that is ripe with fraud and non-responsiveness.
Microcomputers that have been created by the Raspberry Pi Foundation in 2012 have been hugely successful in sparking levels of creativity in young children and this UK based company began offering learn-to-code startup programs like pi-top an Kano. There is now a new startup that is making use of Pi electronics, and the device is known as Pip, a handheld console that offers a touchscreen, multiple ports, control buttons and speakers. The idea behind the device is to engage younger individuals with a game device that is retro but will also offer a code learning experience through a web based platform.

The amazing software platform being offered with Pip will offer the chance to begin coding in Python, HTML/CSS, JavaScript, Lua and PHP. The device offers step-by-step tutorials to get children started with coding and allows them to even make LEDs flash. While Pip is still a prototype, it will surely be a huge hit in the industry and will engage children who have an interest in coding and will provide them the education and resources needed to begin coding at a young age.
Future of Coding
Coding has a great future, and even if children will not be using coding as a career, they can benefit from learning how to code with this new device that makes it easier than ever. With Pip, even the youngest coding enthusiasts will learn different languages and will be well on their way to creating their own codes, own games, own apps and more. It is the future of the electronic era and Pip allows the basic building blocks of coding to be mastered.Computer science has become an important part of education and with devices like the new Pip , children can start to enhance their education at home while having fun. Coding goes far beyond simply creating websites or software. It can be used to enhance safety in a city, to help with research in the medical field and much more. Since we now live in a world that is dominated by software, coding is the future and it is important for all children to at least have a basic understanding of how it works, even if they never make use of these skills as a career. In terms of the future, coding will be a critical component of daily life. It will be the language of the world and not knowing computers or how they work can pose challenges that are just as difficult to overcome as illiteracy.
Coding will also provide major changes in the gaming world, especially when it comes to online gaming, including the access of online casinos. To see just how coding has already enhanced the gaming world, take a look at a few top rated casino sites that rely on coding. Take a quick peek to check it out and see just how coding can present realistic environments online.
How Pip Engages Children
When it comes to the opportunity to learn coding, children have many options. There are a number of devices and hardware gizmos that can be purchased, but Pip takes a different approach with their device. The portability of the device and the touchscreen offer an advantage to other coding devices that are on the market. Pip will be fully compatible with electronic components in addition to the Raspberry Pi HAT system. The device uses standard languages and has basic tools and is a perfect device for any beginner coder. The goal is to remove any barriers between an idea and creation and make tools immediately available for use. One of the other great advantages of Pip is that it uses a SD card, so it can be used as a desktop computer as well when it is connected to a monitor and mouse.The Pip device would help kids and interested coder novice with an enthusiasm into learning and practicing coding. By offering a combination of task completion and tinkering to solve problems, the device will certainly engage the younger generation. The device then allows these young coders to move to more advanced levels of coding in different languages like JavaScript and HTML/CSS. Since the device replicates a gaming console, it will immediately capture the attention of children and will engage them to learn about coding at a young age. It also comes with some preloaded games to retain attention, such as Pac-Man and Minecraft.
Innovations to Come
Future innovation largely depends on a child’s current ability to code and their overall understanding of the process. As children learn to code at an early age by using such devices as the new Pip, they will gain the skills and knowledge to create amazing things in the future. This could be the introduction of new games or apps or even ideas that can come to life to help with medical research and treatments. There are endless possibilities. Since our future will be controlled by software and computers, starting young is the best way to go, which is why the new Pip is geared towards the young crowd. By offering a console device that can play games while teaching coding skills, young members of society are well on their way to being the creators of software in the future that will change all our lives. This is just the beginning, but it is something that millions of children all over the world are starting to learn and master. With the use of devices like Pip, coding basics are covered and children will quickly learn the different coding languages that can lead down amazing paths as they enter adulthood.Over the past few years, web hosting has undergone a dramatic change. Web hosting services have changed the way websites perform. There are several kinds of services but today we will talk about the options that are available for reseller hosting providers. They are Linux Reseller Hosting and Windows Reseller Hosting. Before we understand the fundamental differences between the two, let’s find out what is reseller hosting.
Reseller Hosting
In simple terms, reseller hosting is a form of web hosting where an account owner can use his dedicated hard drive space and allotted bandwidth for the purpose of reselling to the websites of third parties. Sometimes, a reseller can take a dedicated server from a hosting company (Linux or Windows) on rent and further let it out to third parties.
Most website users either are with Linux or Windows. This has got to do with the uptime. Both platforms ensure that your website is up 99% of the time.
1. Customization
One of the main differences between a Linux Reseller Hostingplan and the one provided by Windows is about customization. While you can experiment with both the players in several ways, Linux is way more customizable than Windows. The latter has more features than its counterpart and that is why many developers and administrators find Linux very customer- friendly.
2. Applications
Different reseller hosting services have different applications. Linux and Windows both have their own array of applications but the latter has an edge when it comes to numbers and versatility. This has got to do with the open source nature of Linux. Any developer can upload his app on the Linux platform and this makes it an attractive hosting provider to millions of website owners.
However, please note that if you are using Linux for web hosting but at the same time use the Windows OS, then some applications may not simply work.
3. Stability
While both the platforms are stable, Linux Reseller Hosting is more stable of the two. It being an open source platform, can work in several environments.This platform can be modified and developed every now and then.
4. .NET compatibility
It isn’t that Linux is superior to Windows in every possible way. When it comes to .NET compatibility, Windows steals the limelight. Web applications can be easily developed on a Windows hosting platform.
5. Cost advantages
Both the hosting platforms are affordable. But if you are feeling a cash crunch, then you should opt for Linux. It is free and that is why it is opted by so many developers and system administrators all around the world.
6. Ease of setup
Windows is easier to set up than its counterpart. All things said and done, Windows still retains its user-friendliness all these years.
7. Security
Opt for Linux reseller hosting because it is more secure than Windows. This holds true especially for people running their E-commerce businesses.
Conclusion
Choosing between the two will depend on your requirement and the cost flexibility. Both the hosting services have unique advantages. While Windows is easy to set up, Linux is cost effective, secure and is more versatile.
Back in March of this year, I had a very bad experience with a media company refusing to pay me and answer my emails. They still owe me thousands of dollars and the feeling of rage I have permeates everyday. Turns out I am not alone though, and hundreds of other website owners are in the same boat. It"s sort of par for the course with digital advertising.
In all honesty, I"ve had this blog for a long time and I have bounced around different ad networks in the past. After removing the ad units from that company who stiffed me, I was back to square one. I should also note that I never quite liked Googles AdSense product, only because it feels like the "bottom of the barrel" of display ads. Not from a quality perspective, but from a revenue one.
From what I understand, you want Google advertising on your site, but you also want other big companies and agencies doing it as well. That way you maximize the demand and revenue.
After my negative experience I got recommend a company called Newor Media . And if I"m honest I wasn"t sold at first mostly because I couldn"t find much information on them. I did find a couple decent reviews on other sites, and after talking to someone there, I decided to give it a try. I will say that they are SUPER helpful. Every network I have ever worked with has been pretty short with me in terms of answers and getting going. They answered every question and it was a really encouraging process.
I"ve been running the ads for a few months and the earnings are about in line with what I was making with the other company. So I can"t really say if they are that much better than others, but where they do stand out is a point that I really want to make. The communication with them is unlike any other network I"ve ever worked it. Here is a case where they really are different:
They pushed the first payment to me on time with Paypal. But because I"m not in the U.S (and this happens for everyone I think), I got a fee taken out from Paypal. I emailed my representative about it, asking if there was a way to avoid that in the future.
They said that they couldn"t avoid the fee, but that they would REIMBURSE ALL FEES.... INCLUDING THE MOST RECENT PAYMENT! Not only that, but the reimbursement payment was received within 10 MINUTES! When have you ever been able to make a request like that without having to be forwarded to the "finance department" to then never be responded to.
The bottom line is that I love this company. I might be able to make more somewhere else, I"m not really sure, but they have a publisher for life with me. I"m not a huge site and I don"t generate a ton of income, but I feel like a very important client when I talk to them. It"s genuinely a breathe of fresh air in an industry that is ripe with fraud and non-responsiveness.
Microcomputers that have been created by the Raspberry Pi Foundation in 2012 have been hugely successful in sparking levels of creativity in young children and this UK based company began offering learn-to-code startup programs like pi-top an Kano. There is now a new startup that is making use of Pi electronics, and the device is known as Pip, a handheld console that offers a touchscreen, multiple ports, control buttons and speakers. The idea behind the device is to engage younger individuals with a game device that is retro but will also offer a code learning experience through a web based platform.
The amazing software platform being offered with Pip will offer the chance to begin coding in Python, HTML/CSS, JavaScript, Lua and PHP. The device offers step-by-step tutorials to get children started with coding and allows them to even make LEDs flash. While Pip is still a prototype, it will surely be a huge hit in the industry and will engage children who have an interest in coding and will provide them the education and resources needed to begin coding at a young age.
Future of Coding
Coding has a great future, and even if children will not be using coding as a career, they can benefit from learning how to code with this new device that makes it easier than ever. With Pip, even the youngest coding enthusiasts will learn different languages and will be well on their way to creating their own codes, own games, own apps and more. It is the future of the electronic era and Pip allows the basic building blocks of coding to be mastered.Computer science has become an important part of education and with devices like the new Pip , children can start to enhance their education at home while having fun. Coding goes far beyond simply creating websites or software. It can be used to enhance safety in a city, to help with research in the medical field and much more. Since we now live in a world that is dominated by software, coding is the future and it is important for all children to at least have a basic understanding of how it works, even if they never make use of these skills as a career. In terms of the future, coding will be a critical component of daily life. It will be the language of the world and not knowing computers or how they work can pose challenges that are just as difficult to overcome as illiteracy.
Coding will also provide major changes in the gaming world, especially when it comes to online gaming, including the access of online casinos. To see just how coding has already enhanced the gaming world, take a look at a few top rated casino sites that rely on coding. Take a quick peek to check it out and see just how coding can present realistic environments online.
How Pip Engages Children
When it comes to the opportunity to learn coding, children have many options. There are a number of devices and hardware gizmos that can be purchased, but Pip takes a different approach with their device. The portability of the device and the touchscreen offer an advantage to other coding devices that are on the market. Pip will be fully compatible with electronic components in addition to the Raspberry Pi HAT system. The device uses standard languages and has basic tools and is a perfect device for any beginner coder. The goal is to remove any barriers between an idea and creation and make tools immediately available for use. One of the other great advantages of Pip is that it uses a SD card, so it can be used as a desktop computer as well when it is connected to a monitor and mouse.The Pip device would help kids and interested coder novice with an enthusiasm into learning and practicing coding. By offering a combination of task completion and tinkering to solve problems, the device will certainly engage the younger generation. The device then allows these young coders to move to more advanced levels of coding in different languages like JavaScript and HTML/CSS. Since the device replicates a gaming console, it will immediately capture the attention of children and will engage them to learn about coding at a young age. It also comes with some preloaded games to retain attention, such as Pac-Man and Minecraft.